This guide will help you install and set up Smartlaunch. Before starting the installation make sure to quit all other running applications and installations.
Step 1: Install Smartlaunch
Download the Smartlaunch installer from here and start the installation. After the License Terms screen, you can choose which part of Smartlaunch you want to install, the options are:
- Server Module – Install the Smartlaunch Server on a server machine running Windows Server 2003 / 2008 / 2012 / 2016 or Windows Server 2019. You can install the Smartlaunch Server on Windows 10 if you have lesser than 20 PCs at your center (this is because Windows 10 can handle connections from up to 20 PCs simultaneously). You configure users, games, and applications in the Smartlaunch Server.
- Administrator Module – Install the Smartlaunch Administrator on a PC at the reception / front desk of your center. Esports Centers with lesser than 20 PCs often install the Smartlaunch Server and Administrator on the same PC at the front desk. Your staff will use the Administrator to manage customers and to control the computers at your center.
- Client Module – Install the Smartlaunch Client on each of the PCs at your store.
Step 2: Starting Your Smartlaunch Server for the First Time
After the installation, you will find some new shortcuts on your desktop, depending on which modules you chose to install. Double-click the orange Smartlaunch Server icon to start the server.
Every time the server starts, it will check if there are any new updates available for download. Checking for updates can also be done manually later on from the Server window.

Downloading Updates
If an update for the client or the administrator module is found, they need to be restarted in order to be updated. The client can also be forced to update from the Administrator module by right-clicking the computer and then clicking Force a client update from the Utilities submenu. The first time you launch the server, a setup guide will start, helping you customize the server, and also help you activate a new or already existing Smartlaunch account.
On the first screen, you select your geographic location, and your desired language; this will from now on be the default language for both the server and the client.
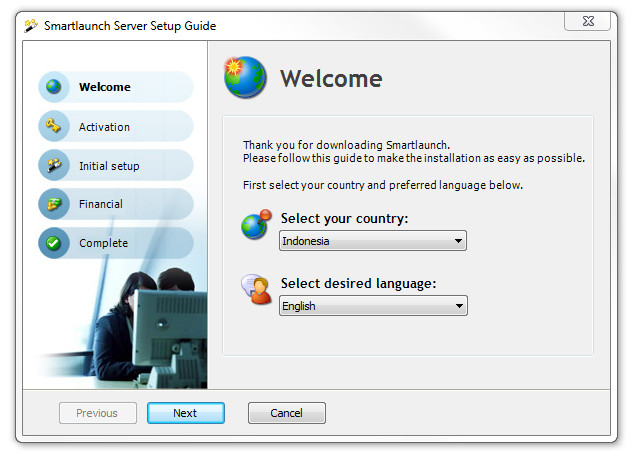
Country and Language Settings
If you would like to continue using the product you can easily upgrade your trial license by visiting our Pricing page.
Step 3: Customizing Smartlaunch for Your Center
This step will ask you to specify which operating system you have on your client machines. This will enable Smartlaunch to set up your security settings, most fitting for your operating system. If you have chosen to install all of your games under the same folder, instead of its default locations, then specify this just below by clicking Yes and type the path to your Games folder. This will enable Smartlaunch to help you with setting up license management and personal user files for your games and applications.

Setting up the clients
The final step will let you specify your hourly rates, and the TAX percentage for products and computer time in your country. If you want to set a rule for your establishment to prevent customers from buying for less than a specific amount, fill in the Minimum Price text boxes; otherwise, leave it empty to allow any amount. You can specify more advanced price settings in the server settings later on.

Setting hourly rates and taxes
The Smartlaunch Server is where you set up your esports center’s users, and configure your software and hardware. The Smartlaunch Server runs silently in the background, and the only time you need to work on the Server is when you have to alter settings.
The Smartlaunch Server
Once you have installed the Smartlaunch Server on your server computer, you can launch it directly from the desktop. As soon as the server has completed the loading process, it will appear in the system tray in the lower right corner of your screen.
If you double-click the orange Smartlaunch icon, the Server will pop up.

- General
Shows some general information about the server such as IP address and uptime.
- Connections
The actual numbers of concurrent connections, both clients and administrators.
- Updates
View the current version of your installation. To check/receive the latest updates press the button called Check for Updates.
Unlocking the Smartlaunch Server
To get access to the Smartlaunch Server you need to press the button called Unlock. This will bring up the following screen prompting you for a username and password.

If this is the first time you try to enter the Smartlaunch Server Settings the standard username and password is admin/admin. We recommend, that you delete/change this account to avoid any unauthorized access to the server.
Entering the Smartlaunch Server Settings
When your username and password have been accepted, two more buttons will be useable – Shutdown and Settings.
Shutting Down the Smartlaunch Server
- Unlock the server as described above.
- Press Close.
- When you get prompted, answer Yes to close the server.
If you close the server, any connected client will continue to run. This is useful if you for some reason need to restart the Smartlaunch Server during rush hour.
Install the Client Modul
Double click the Client.exe to begin the installation.
If this is the first time you launch the client you will also get to specify the computer number. Every computer in your establishment must have a unique computer number; otherwise, they will block each other out from the server. You can change the computer number from the client’s settings menu (Once in the client, press ESC to access the Client Settings).

After specifying the computer number the server tries to locate the Smartlaunch server automatically, if it does not find it you will have to specify the IP address manually.

The clients use port 7831 to connect to the server, so if you are running a firewall with internal rules between the clients and server, don’t forget to open this port.
Configuring the Client
To access the settings window from the client, press the ESC button when the client is active, and type the administrator username and password into the text boxes (the default username and password is “admin”). From here you can change the settings for this client, such as the IP to the server, computer number, or display properties for instance. From here you can also deactivate the Smartlaunch client and go back to the normal Windows display.
For more information about the client, see the article Introduction to the Smartlaunch Client